Rooterpot help
If you have any hints or clues as to how to use the rooterpots, you can add them here, just send me an email with the information, I will add them to this page.
One question that has come up over and over is: Do I put the rooterpots above the wound or with the wound inside the rooterpot? The wound must be at least 1 inch in the soil inside the rooterpot.
Don't start using rooterpots until all danger of a hard frost is over, the ice formed in the rooterpot could crack the reservoirs and make them unusable.
After you water the rooterpot for the first time, be sure to go back a few minutes later and fill them again, water is absorbed by the soil sometimes it empties the reservoirs completely.
After you snap the rooterpot on the stem, put a piece of tape just below the rooterpot so you know exactly where it should be. If you don't, the rooterpot could slide up or down as you fill it and the wound will not be where you intended it to be when you are done.
Put a small hole in a lid of a plastic container where you keep the rooting hormone, and insert a small painters brush in it. This keeps it from spilling all over the place.
Mix about a tablespoon of watersorb with every gallon of soil used in the rooterpots. Also incorporate some vermiculite. This practice keeps more water within the rooterpot.
|
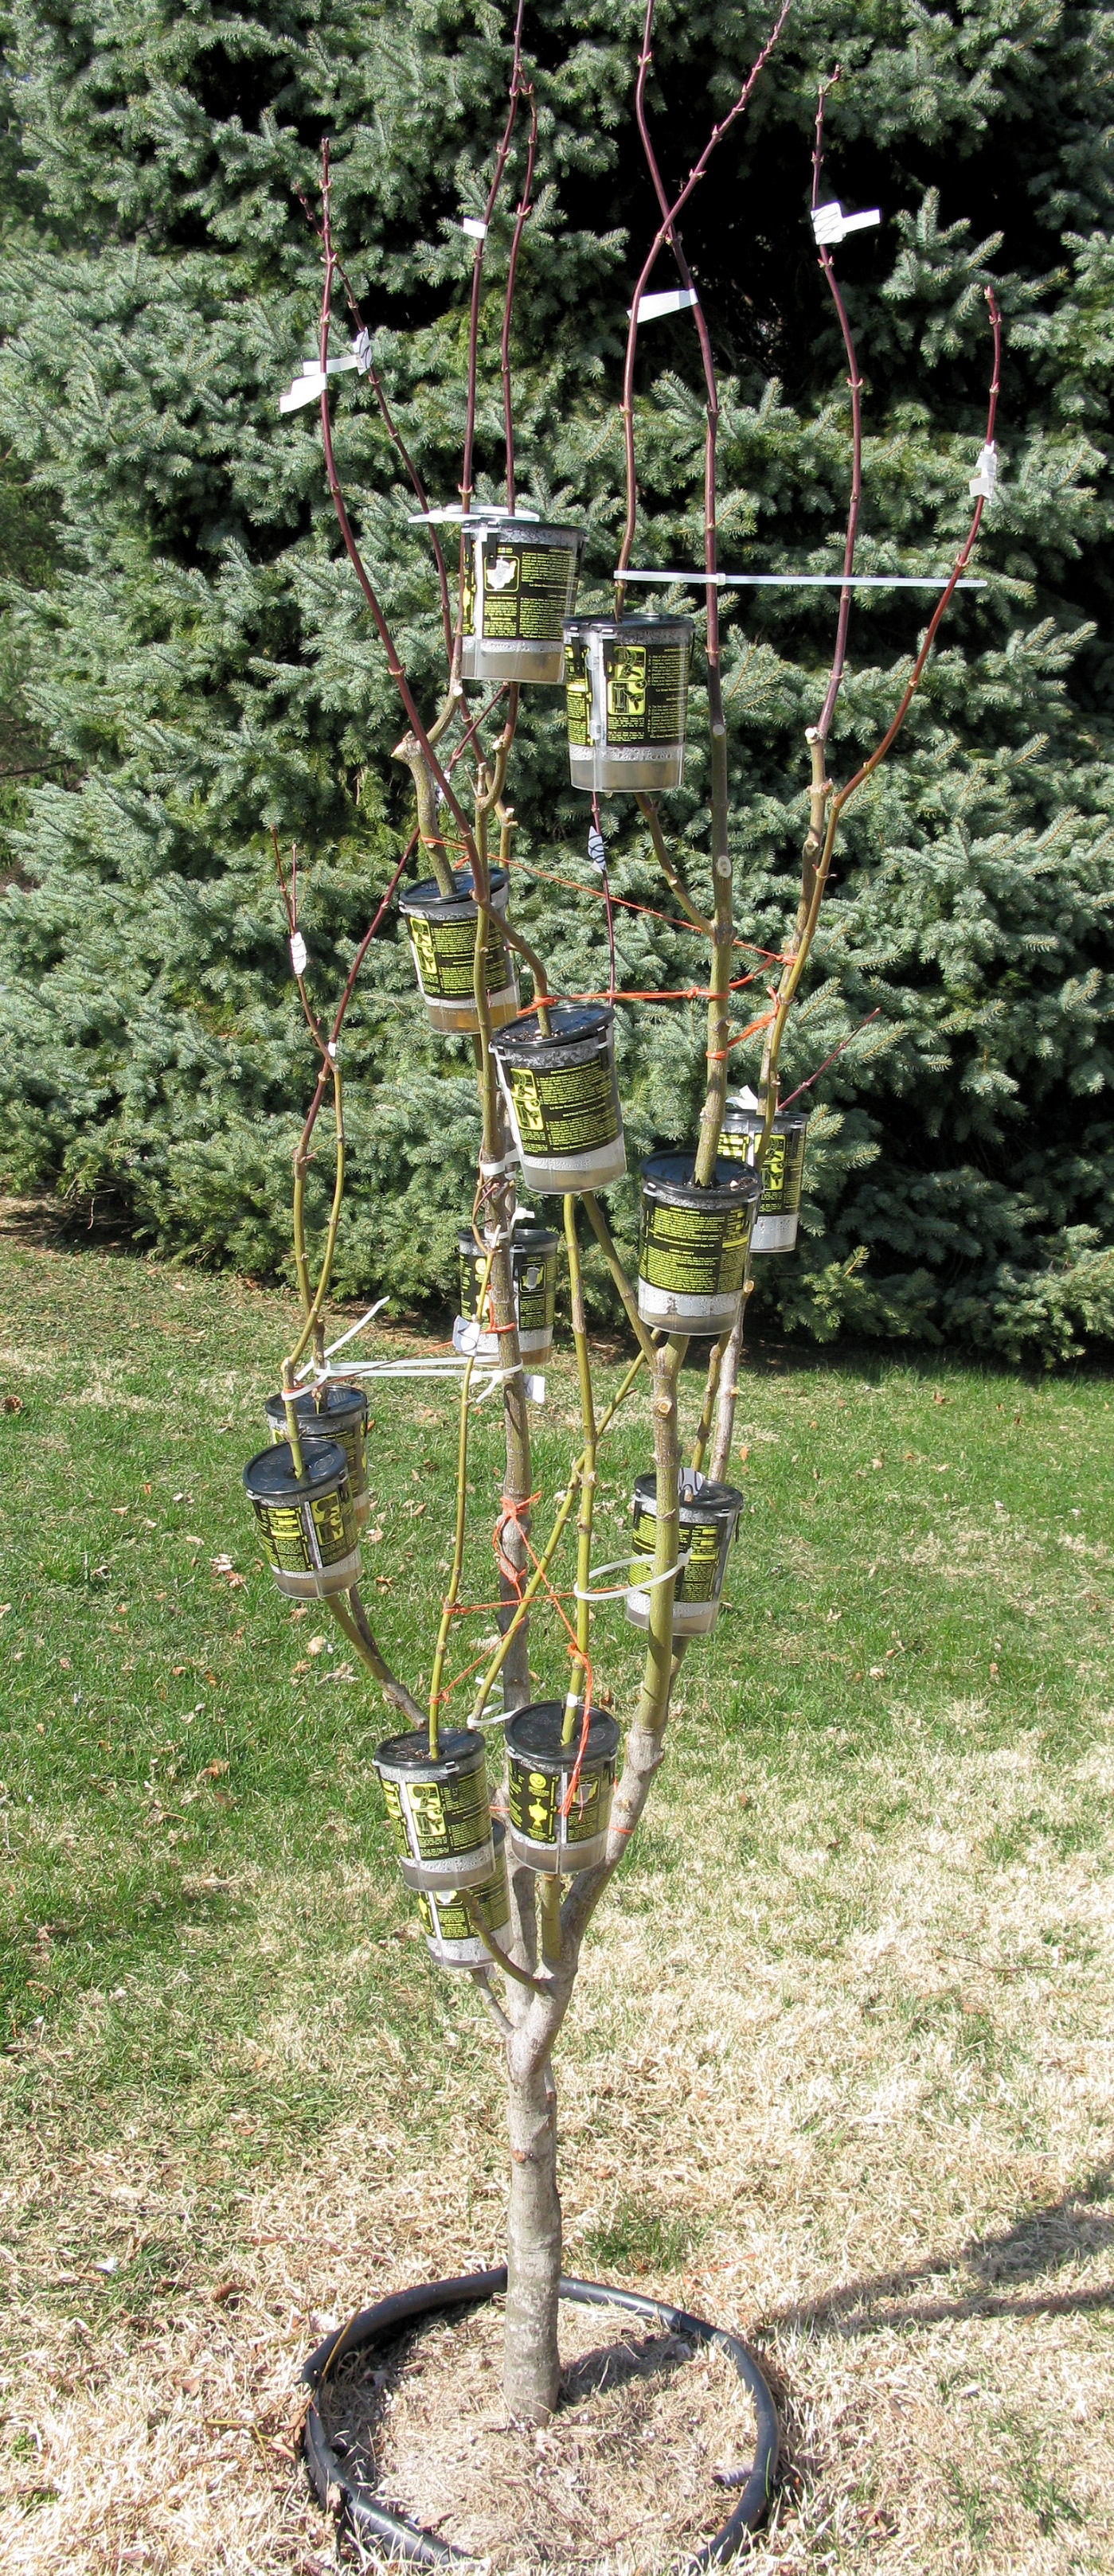
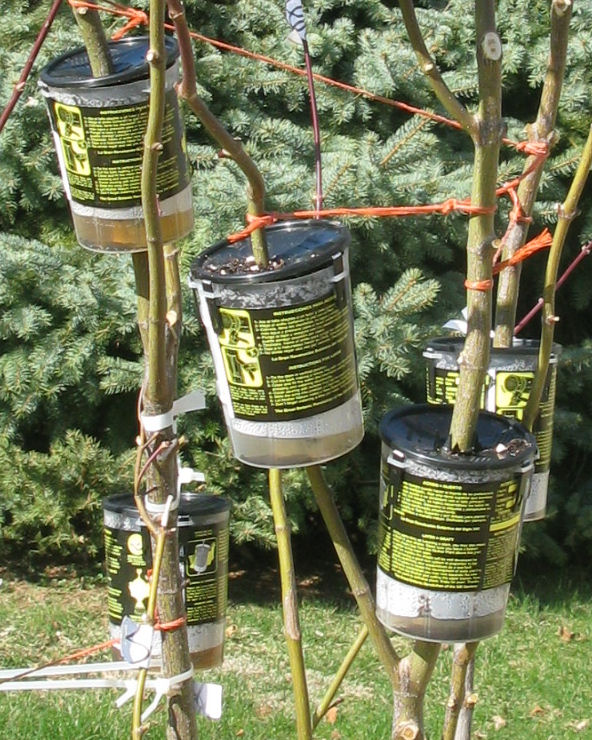
This is my first experiment with Rooterpots. This was an 8 ft. tall Red Japanese Maple, We removed every branch that did not look like it belonged for my purposes.
Then we put pieces of tape where we figured we should have rooterpots and more tape of another color where we felt grafts should go. To finish, we added 13 rooterpots to those strategic points. Yes, we used a lot of twine in the process. Since today is March 31st, we must now wait until the danger of frost is over in order to do any grafting. In my area is May 10th . I have the laceleaf scions in the freezer at 28 degrees, I hope they survive.
|
|
 |
|
UPDATE - June 17,2009 - Today, I just removed my first rooted tree. The rooterpot was on a Valley Forge Elm. I have been trying to propagate this tree for the last 4 years with no success at all. This rooterpot was on the tree for about 10 weeks. I do have other rooterpots on valley forge elms, none of the others seem to be rooted yet. Now that I know it works, I will be checking them every week. Here is a photo of the 36" tree just before it was potted. |
 |
|
A different success. Mid June, I put a rooterpot on a 2.5 ft. branch of an NE-41 hybrid poplar. I removed it 11 days later, branch already rooted. Here is the photo to prove it Caution After removing a new tree from the rooterpot and potting it, be sure to keep it in the shade for a few days, better yet, under intermittent mist. | .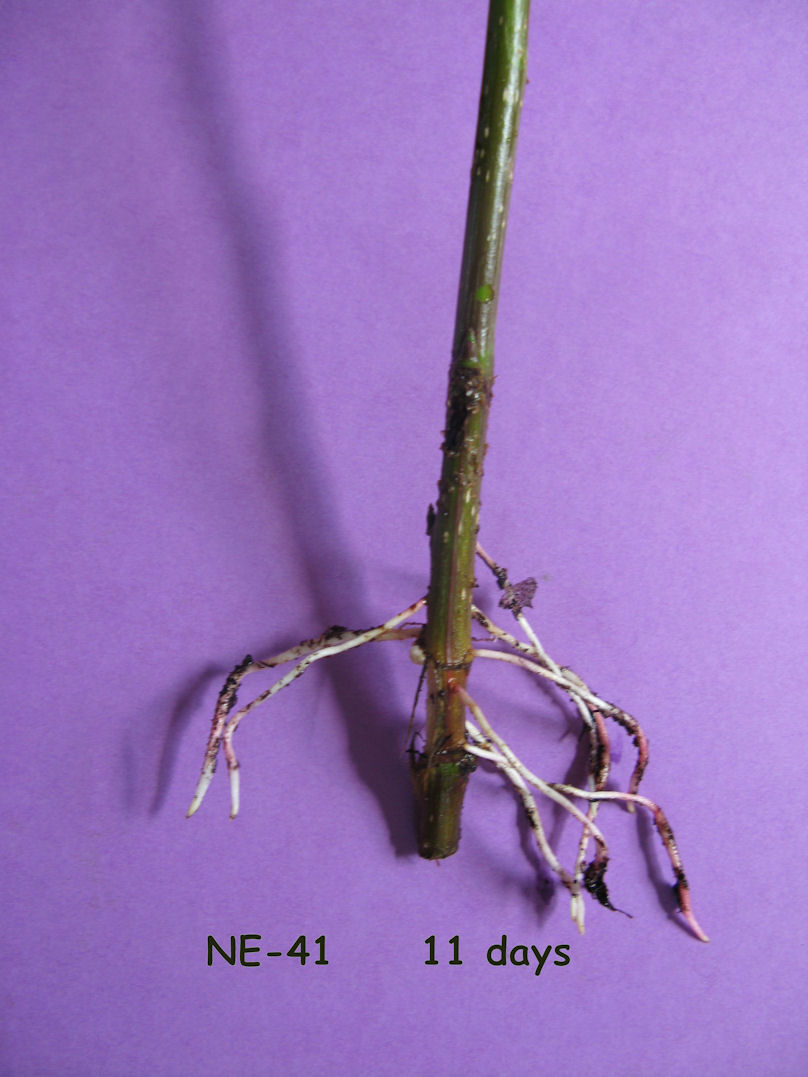 . . |
|
Another idea. I felt the need to have a watering device for the rooterpots because it is difficult sometimes to reach overhead to get to the ones that are 7 ft. high. This is what I came up with. I used a half gallon milk jug and added a piece of stiff plastic hose (Home Depot). the hole in the lid is undersized, that will give it a good fit, after that you can put some glue on both sides of the lid. I bent the hose with heat. The hose must reach the bottom of the bottle for it to work. To use it just squeeze the bottle. | 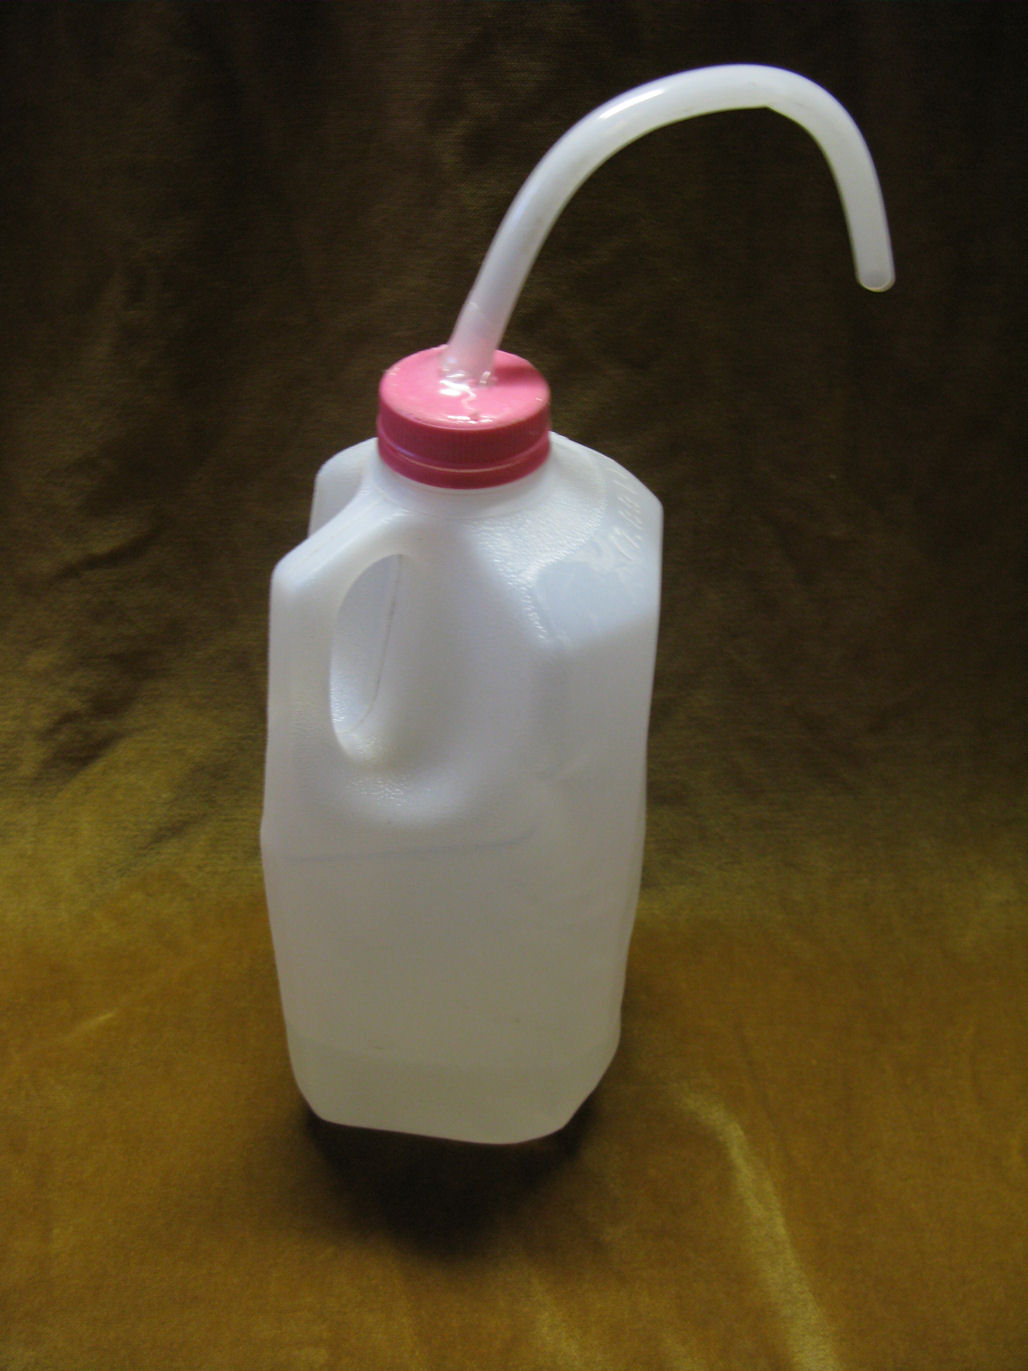 |
|
This idea came from Louis Robles in Montana. Place a piece of tape around the stem just above the rooterpot at the time of installation. Rooterpots have the tendency to slide down the stem. If you see a space below the tape, you will know the rooterpot is not where it should be. |
Hi Frank
I want to thank you for the rooter pots, they work great. I placed all 6 0n fruit trees. Three on santa rosa plum and three on tangerine. In approx 12 weeks they had roots on them 3" to 4" long. and I have just ordered more pots.
John Dunn Dujons, Lakeside, CA.
Front Page